Month: September 2014

Fall Panorama

Untitled_Panorama1

This is a 15-shot HDR panoramic image taken near Victor, CO. It was made by blending 5 horizontal files each made with 3 exposures at +/-3EV.

After blending and tone mapping the exposures in Photomatix, I used Photomerge in Photoshop to create the panoramic image. I cropped to remove the misalignment between frames at the bottom. To remove the misalignment at the top, I used Content Aware Fill. I applied basic adjustments with the Camera Raw filter and tweaked the color with the HSL tool. I finished by adding a curves adjustment layer.

Fall Sunset in HDR

IMG_6830_1_2_tonemapped

This shot was taken near Bison Reservoir outside of Victor, CO. It is a 3-shot HDR image with +/-3EV. The sun came through an opening in the clouds, creating a sliver of light on the mountain.

After blending and tone mapping in Photomatix, I applied the Camera Raw filter to make basic adjustments and tone down the reds and oranges with the HSL tool. I also used the filter to add a gradient to the foreground to darken the grass a bit. I then applied a Hue/Saturation adjustment layer to bring the reds down a little more. I added a curves adjustment layer and used the Shadow/Highlight tool to bring down the exposure in the bright areas. I removed some unwanted elements with the Spot Healing Brush.

Josh

IMG_6764

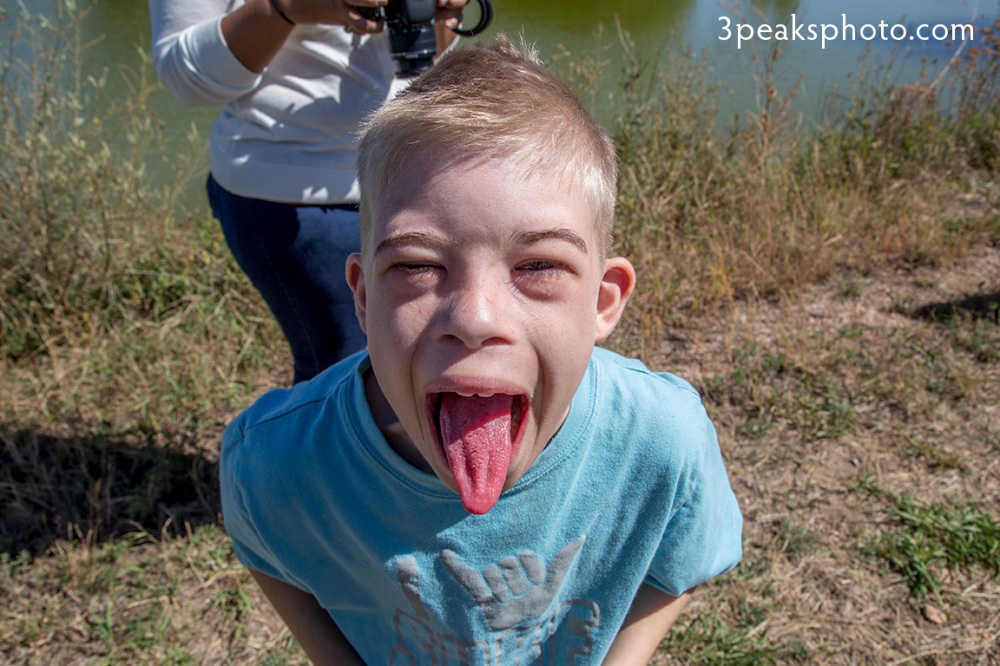
This is Josh, and as you can see, he’s a riot.

My photography organization, The Colorado Photography Learning Group, did a photo shoot today with the local Down Syndrome Association chapter at Pinello Ranch. We had a blast taking pictures of the chickens and the ponds and anything else that caught the kids’ eyes. We are hoping to raise money to buy cameras for kids to use so we can plan many more events like this with DSA and other organizations.

Each time I asked if everyone was having fun, Josh would yell, “NO!” But he kept saying, “Cheese,” which meant he wanted you to take his picture. Most of the time, he would run right up to your camera, so you could get an extreme close-up of his face. I think he had more fun than anyone else. He even gave me a hug when we were leaving.

We are going to have photos from this shoot in a gallery show that will hang in December at the City of Colorado Springs’ administration building. It will be great to see the kids work hanging on the walls. I’m sure they will be excited about it.

If you’d like to see more photos from this shoot, visit this link: http://www.meetup.com/cplg_cos/photos/24788332/

I only made basic adjustments to the photo in Adobe Camera Raw.

Brooke Before and After

IMG_2836

This is Brooke. She had me do portraits for her business cards. The original photo is on the left, the edited version is on the right.

I made a few basic adjustments in Adobe Camera Raw, then used the Spot Healing Brush and Clone Stamp in Photoshop to remove unwanted spots, touch up the areas under her eyes and tame stray hairs. I used the dodge and sponge tools to brighten her eyes. I used the Liquify tool to make her left arm thinner and by doing so, made her entire body seem slimmer. I selected the background and applied the field blur filter, then added a vignette with the radial tool in the Camera Raw filter.

Where’s the Fire?

IMG_2795

This is a photo of the top of a fire hydrant in Old Colorado City on the west side of Colorado Springs. It was taken during our photo walk as part of Scott Kelby’s International Photo Walk Day.

I used Adobe Camera Raw to make basic adjustments, and I used the HSL tool to adjust the hue and saturation of the blues and aquas. In Photoshop, I used the burn tool to darken some distracting highlights and added an exposure adjustment layer.

Gold Reflection

IMG_1930

This is the creek along the Seven Bridges Trail in Colorado Springs, CO. The gold color in the water is caused by the reflection of rocks in the background. This is a 1/8 sec exposure at f13.

In Adobe Camera Raw I made basic adjustments and used the HSL tool to pump up the oranges and yellows and decrease the blues. In Photoshop I used the Spot Healing Brush to remove bright, distracting elements and added a curves adjustment layer.

Who Likes Fall?

IMG_6613_4_5_tonemapped

I do! I only wish the colors around here lasted more than a couple of weeks.

This is a 3-exposure HDR image with +/-2 EV. It was taken on Sunday near Cripple Creek, Colorado.

After blending and tone mapping the files in Photomatix, I applied the Camera Raw Filter in Photoshop to make basic adjustments, increase sharpness and decrease noise. I also added gradients on the top and bottom to reduce the exposure in those areas of the image. I then applied a curves adjustment layer.

Foggy Fall

IMG_6585_tonemapped

This is a 3-exposure HDR image with +/-2 EV of the fall colors near Cripple Creek, Colorado. That is Pikes Peak in the distance. It was cloudy all day, and I was lucky enough to catch this break in the clouds. It was in the 40’s, and I forgot to bring a jacket with me, so I couldn’t stay in one place very long before I started freezing.

After blending and tone mapping the files with Photomatix, I used the Camera Raw filter in Photoshop to make basic adjustments and tweak the color with the HSL tool. I used Content Aware Fill to remove a telephone pole and removed some wires and road signs with the Spot Healing Brush. I added a curves adjustment layer and a blue photo filter.

Blue Highlight Tina

IMG_6514

Tina modeled for my portrait class again today, and we had enough time to experiment with the boom I bought for adding a hair light. I placed my backdrop light on the boom with a colored gel and a modifier to create the effect.

I made basic adjustments in Adobe Camera Raw. I also adjusted the orange and red hues a bit in the HSL tool to even the skin tone a little. In Photoshop I used the Spot Healing Brush to remove blemishes. I used the Clone Stamp to get rid of stray hairs that caught the blue light. I brightened the eyes and teeth with the dodge and sponge tools and reduced the highlights on her face and shoulders a touch with the burn tool. I selected the backdrop with the Magic Wand and added a surface blur filter to make it look more out of focus.